
0030 Basic - Creating tasks


Hello ClickUp enthusiast! Greetings from Ernesto.
As we have already discussed, tasks are contained in lists, so to create a task it is necessary to first create a list. The lists can be contained in a "Space" or in a "Folder".
To create a list in a "Space", it is necessary to click on the "+" sign to the right of the name of the space:
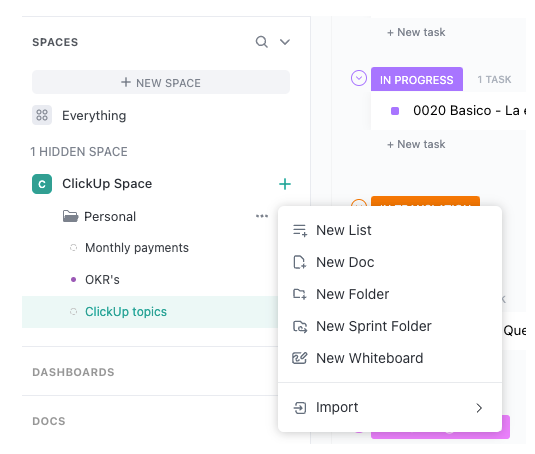
Some of the options that are presented we have already discussed before are: "New List" and "New Folder". The other options will be discussed in a future installment.
Similarly, if you decide to add a list to a "Folder", you need to click on the "+" sign to the right of the folder name:
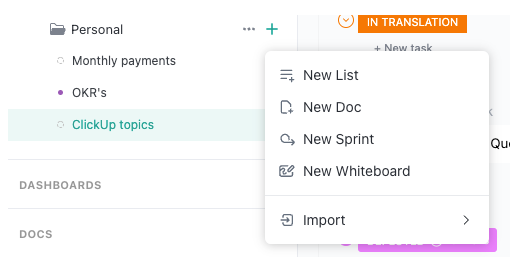
The only difference with the "Space" case is that the "New Folder" option does not exist, since ClickUp does not allow nesting of folders - creating folders within folders.
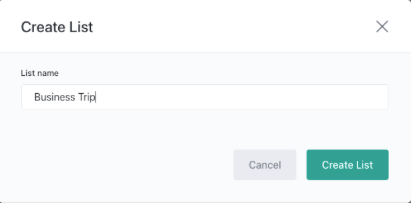
For example, if we create a list at the "Space" level, when selecting "New List" ClickUp will show a window through which we must assign a name to the list and click on the "Create List" button. In the following image a list called "Business Trip" is created:
When the task list is created, ClickUp will show a screen similar to the following:
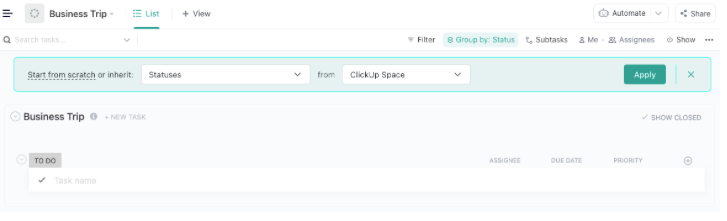
The first thing to do is determine the "Statuses" that we want to use in our list, the task lists, can inherit the pre-determined statues at the level of the containing folder or at the level of the containing space. Let's start with the most basic option, this will help us better understand how "Status" work - click on "Start from scratch" this will give us the most basic statuses.
Position the cursor on the TO DO label that represents the tasks that are in this state and click on the three points, select the "Manage Statuses" option, you will see the following screen:
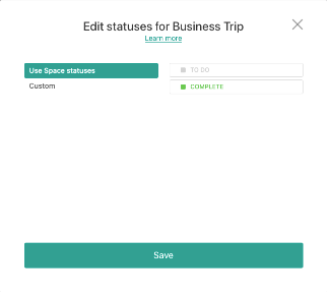
The only thing that this window shows are the statuses that our task list has, as you can see, it only has two states: “TO DO” and “COMPLETE”. Very simply, the tasks on our list will have only two possibilities: To Do or Done (complete).
We'll talk about this screen in a future installment, the important point to make is that states can be set at the task list level like we did right now, at the folder level, or at the space level. Choose the option to close the window to continue.
Click on the empty rectangle of the first task and give it a name: "Plan the trip's business agenda." and immediately after that click the "Save" button.
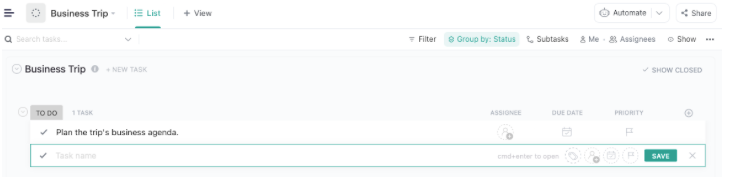
This way you can add all the tasks that you consider necessary to plan a business trip.
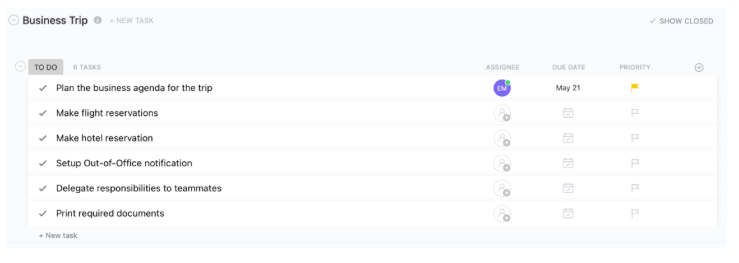
I have added a few more tasks to the list as shown in the following image:
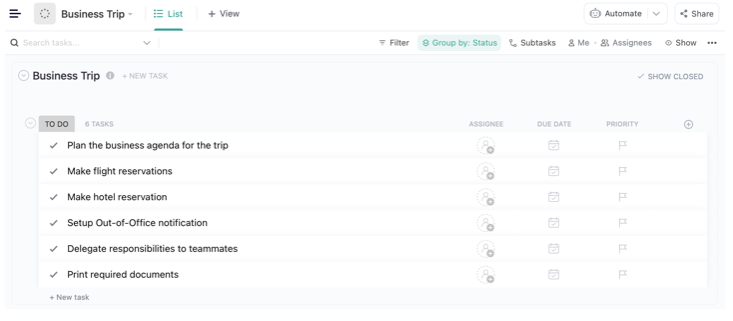
ClickUp displays task lists using what it calls "views"; the default view is the "List" view (note at the top left of the image the word "List" selected with an underline and both in green, meaning it is the active view). This view, as its name suggests, displays tasks in a list.
Note also that the list is "Grouped by: Status" so all the tasks are included or "below" the "To Do" label, which is one of the statuses that we decided to include in our list. We will talk about how to group tasks later in this article, for the moment it is enough to note that the option "Grouped by: Status" is selected in green.
To the right of the name of each of the tasks in our list, 4 additional columns are displayed: "Assignee", "Due Date", "Priority" and a plus sign "+" that we will detail ahead.
The first three are "fields" or "attributes" of the task, we have not assigned any value to these yet and that is why they are shown empty. But these are not the only fields available in our tasks, there are many more. To add information to a field, we can do it directly on the corresponding column of the task in question or we can see the complete detail of the task by clicking on the name of the task. Clicking on the name of the first task "Plan the business agenda of the trip" the following screen is presented:
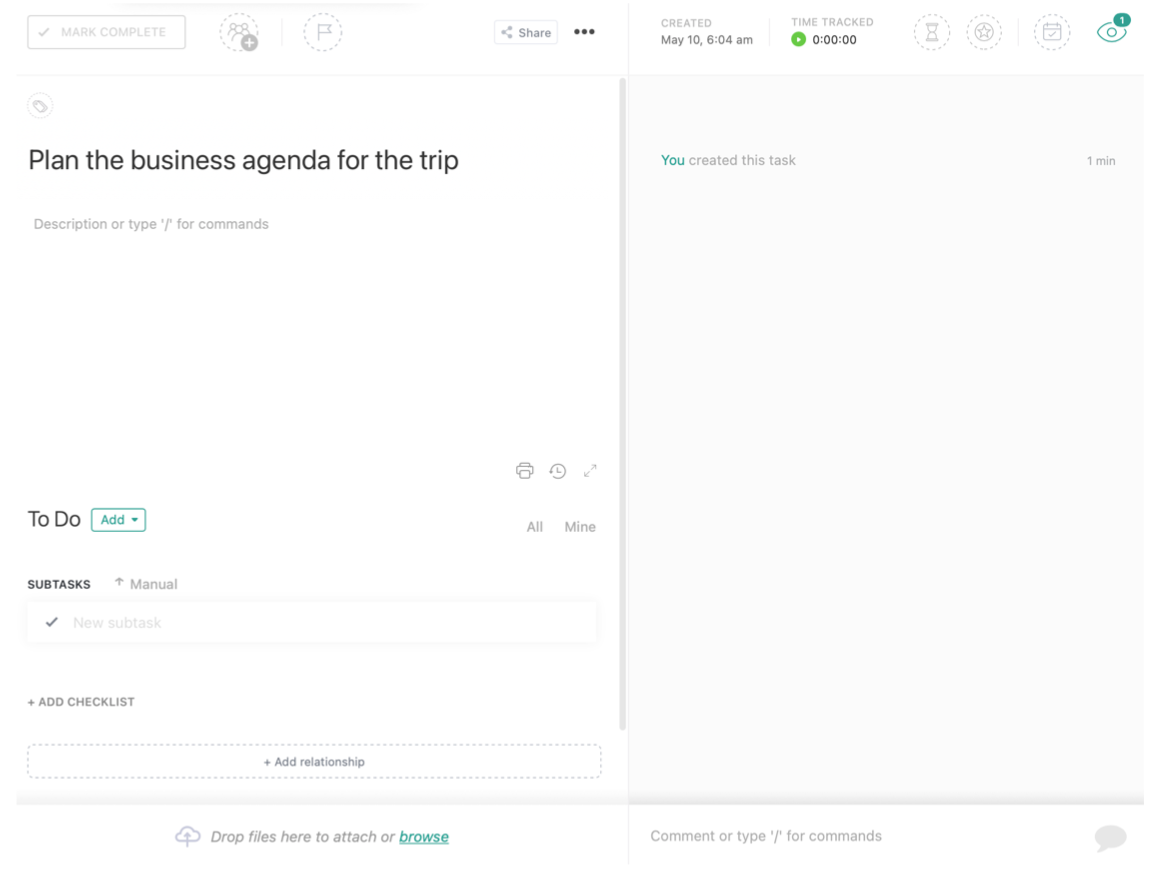
Here at a glance you can see most of the fields or attributes of the task and you can edit each of them. Let's look at some of the most important:
"Assignee" - I can assign the task to any member of the team (ClickUp user). By clicking on the "assignee" icon, a list of possible members to whom the task can be assigned is displayed, in this case, only my name is displayed on the list since I am using a personal space that only I have access, but if I had more members on my team, their names would show up on the list.
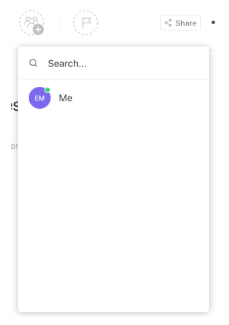
Once I have assigned the person responsible for the task, their name is displayed in the assigned section.
An important feature of this field is that the task can be assigned not only to one person but to several, it may be that the task needs to be solved through a work group that includes several people. For this reason, an additional icon to the right of my name is shown in the image above in case you need to add another person responsible.
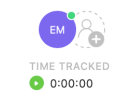
Two essential fields for a task are the start and due dates. ClickUp has a very complete notification mechanism that allows you to establish under what circumstances you want to receive a notification. One of the most used attributes to trigger notifications is precisely the start and due dates of a task.
Click on the "Due Date" icon to display the calendar as shown in the image:

As you can see, the "Start date" and the "Due date" can be specified. You can also include the time in both dates. On the left side there are "shortcuts" to put dates in a more agile way without having to look for them in the calendar: "Today", "Later" this option uses today's date adding six more hours to the current time, "Tomorrow", "This weekend" this option selects this Saturday, "Next week" selects the following Monday, "Next weekend" selects the following Saturday, "In 2 weeks" selects today in two weeks, and "In 4 weeks" selects today in four weeks.
Experiment with the different options, if you select a start date and then a due date, you will be able to see how the dates light up on the calendar to clearly visualize your selection. It is also important to note that it is not possible to add invalid dates and that the start date must necessarily be less than the due date.
Experiment with the "Add time" option that is displayed to the right of any of the dates, clicking on this area displays a selection list of available times. I have noticed that instead of going through the list with the pointer (mouse) it is easier to type the first number of the time I want to select and this will immediately reduce the selection list, making it easier to choose the desired one.
Finally, we will see the "Recurrence" option in a future instalment, this option allows, as its name indicates, recurring tasks that when they are marked as completed, are regenerated again with the new recurring dates.
"Set priority" is another frequently used field that allows us to differentiate tasks by priority, click to select the priority you want to assign to your task as shown in the following image:
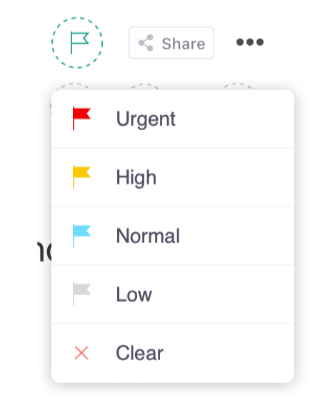
Tasks can only have a single priority and this can be any value in the list or leave the field without any value.
An important field is the task description. Many tasks are often not completely clear from just the name; in addition, it is important to keep the name of the task short to be able to display it in the different ClickUp views in the best possible way and use the description field to describe clearly and in detail what the task consists of. Some tasks are part of a specific process, so the description can also include what is known as a: Standard Operating Procedure (SOP). This is somewhat similar to how a quality management system is documented. If the task is part of a process that is constantly repeated, it is important to include a SOP in the description, which can be constantly updated to make it easier to carry out the task and to do it consistently.
Other fields that can be added to the task are: "Subtasks" and "Checklists", these are very useful when it is necessary to break down the task into specific steps for which any of these two options can be used. We will talk about these options in future instalments.
Another interesting field is the "Attachments" field that allows to add documents to the task. They can be images, text documents, spreadsheets, etc. ClickUp has its own internal system to create text documents, this option is very powerful and the text editor is quite functional so that all the information is stored on the same platform without the need to include files from external sources.
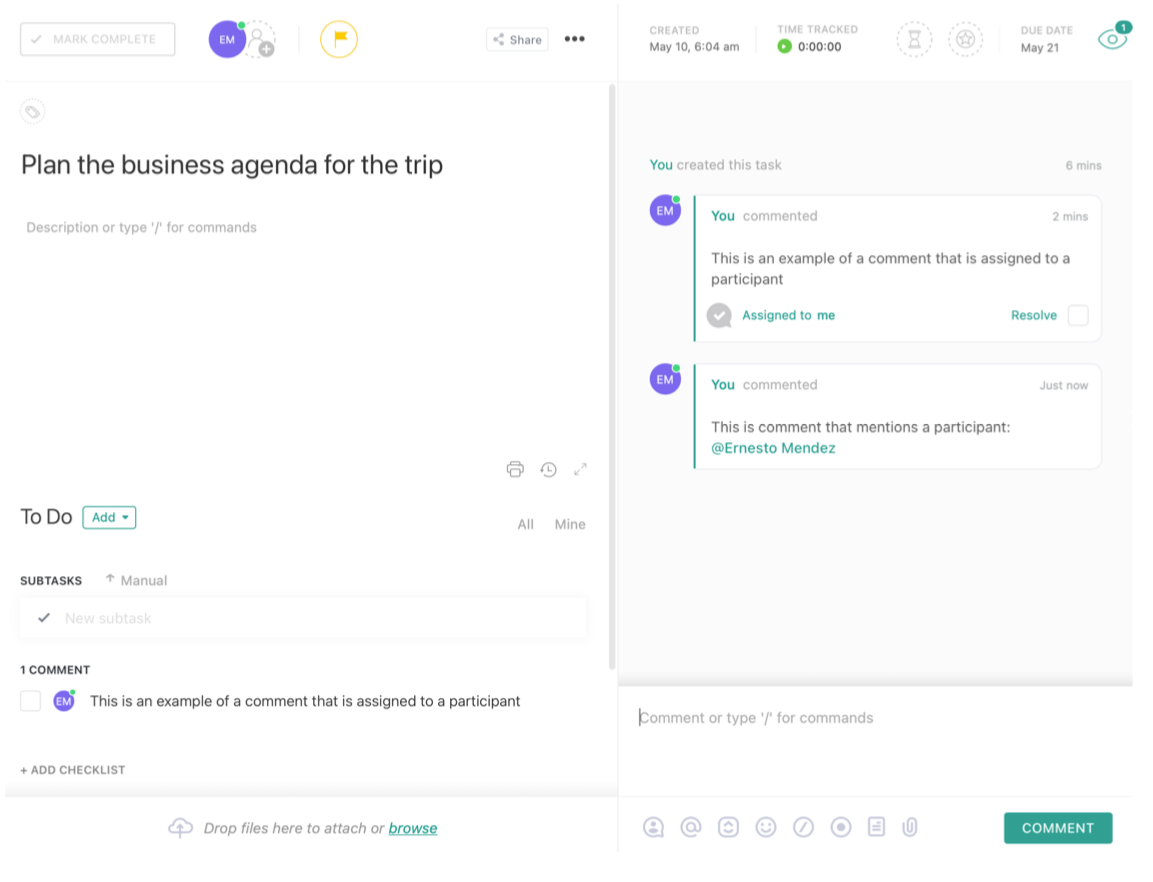
The last field that I would like to mention is the comments field, this field allows you to add comments to the task and even mention or assign the comment to a particular colleague, in this way the team's communication around a task is concentrated on the task itself and can be viewed by all participants. When the comment is assigned to a participant, the comment also appears within a checklist that must be marked as completed by the mentioned participant. Communication between participants is essential to successfully completion of the tasks or processes and this option offers the ideal solution to achieve this goal. ClickUp can generate alerts in the event of a mention or assignment within a task, so they never go unnoticed. The following figure shows a couple of comments added to the example task we created:
There are some other fields within a task and; as if that were not enough, it is possible to create custom fields. We have reviewed only the most used fields and those that provide greater value, in future instalments we will talk more about the rest.
Click on the top left corner of the task to close the task detail and return to the list view. After assigning values to some of the task fields, the list now looks like this:
To end this delivery, I just want to touch on a point that I left pending at the beginning: the grouping of tasks in the list; as I already mentioned, by default the tasks are presented grouped by "Status". However, I can group them in different ways, clicking on the "Group by:" label presents the different options:

"Status" | Default value, groups tasks by "Status" or status of the task. |
"Assignee" | Group based on assigned person |
"Priority" | By priority |
"Tag" | Based on the tag assigned to the task. Note: the tag is a field of the task that we do not review in this article. |
"Due date" | By due date |
"None" | Without grouping, it presents only the task list |
"Custom" | Grouping by any of the custom fields that have been created |
For example, if I group by priority, the tasks will be displayed as follows:
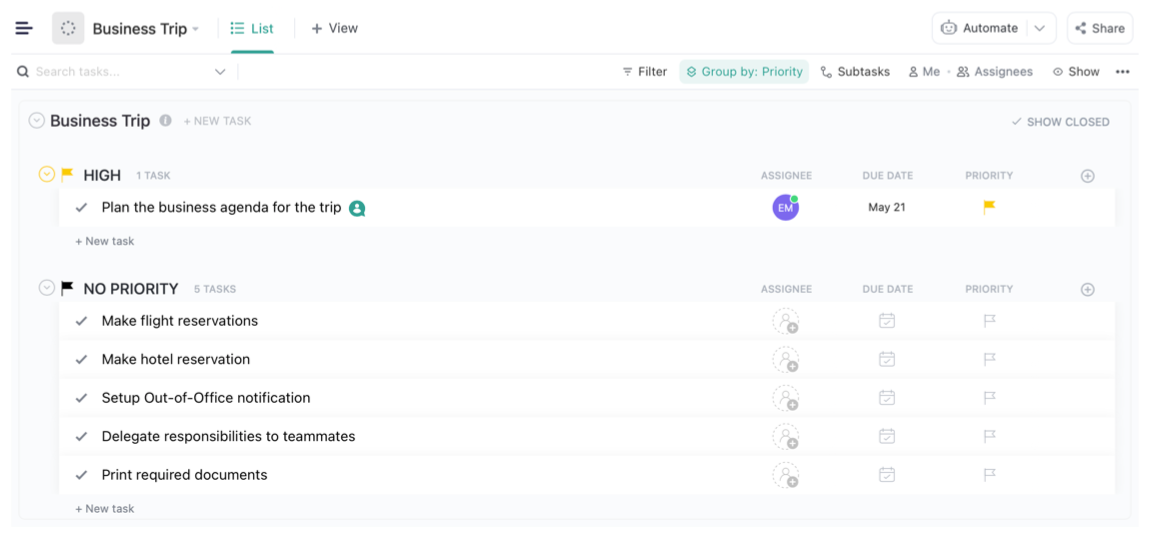
Only one of the tasks has a priority assigned, the others do not.
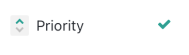
The order in which the tasks are displayed is based on the arrow that is displayed to the left of the grouping that is selected:
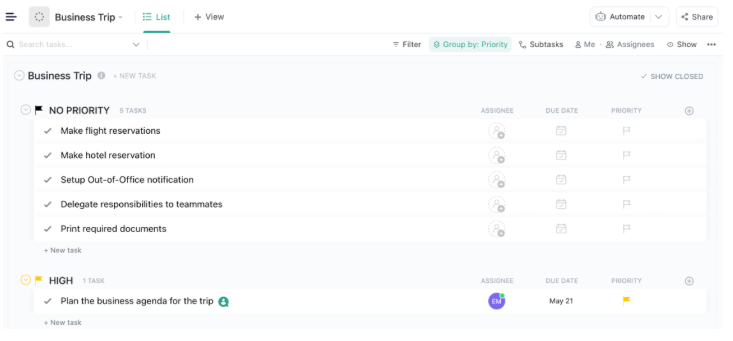
If we click on the arrow pointing down (descending) the tasks will be displayed as follows:
Until next time and remember that the standardization of plans and processes does nothing more than improve the quality of the result and repeated iterations generate an upward spiral.