
0060 Basic - Custom fields


Hello ClickUp enthusiast! Greetings from Ernesto.
A feature that ClickUp offers for the management, control and administration of tasks is the possibility of using custom fields that allows additional information to be recorded for each task on top of all the fields or attributes that ClickUp includes by default.
Each view has a predefined set of fields that can be used/viewed through the user interface offered by the view; however, each different view offers the possibility of seeing the detail of the task, which is the interface that shows the full content of the task; that is, it includes all of the available fields.
The "list" view and the "table" view are the only ones that can be modified in such a way as to show or hide fields (columns), change their order or add custom fields. In all other views, displaying additional fields is very restricted and only some allow it.
ClickUp offers a long list of fields or attributes ready to be used in the tasks of any project; however, it is common to have the need or requirement to capture additional information in the task that ClickUp does not include within its standard fields.
Before adding a custom field, it is important to review the full list of available fields that ClickUp includes. In each of the different views available in ClickUp, different sets of fields are displayed, depending on which ones ClickUp considers most necessary to display. However, in the "list" view, which is the most common view to see tasks, you can add any of the fields that ClickUp includes and display it as an additional column in the view.
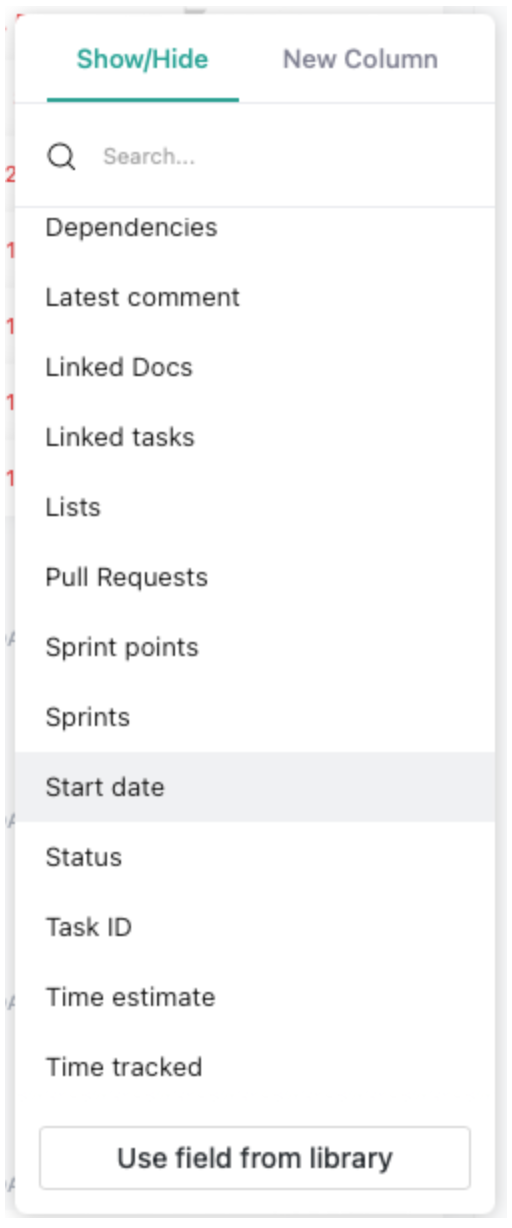
To see the complete list of fields available in ClickUp, it is necessary to click on the extreme right of the list view on the "+" sign to display a menu that contains two tabs: "Show/Hide" and "New Column".

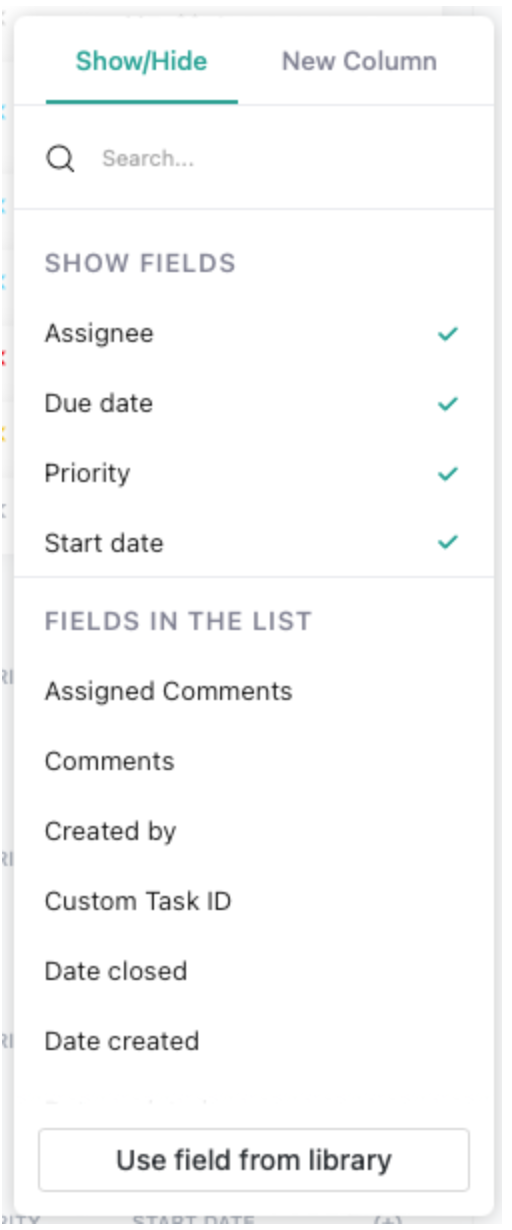
At the top of the "Show/Hide" tab, in the "Show Fields" section, the fields that are currently displayed in the view are shown, this is indicated by a checkmark (✔️) icon to the right of the field name. The next section in the tab is "Fields in the List", and shows the complete list of fields available by default from ClickUp. For example, find the "Start Date" field and click on it to include it in the "Show Fields" section:
Click anywhere outside of the menu to return to the list and you will now see the "Start Date" field included in the "list" view.

If you move the cursor over the field name label, it will light up and display the options to sort by this column (in ascending or descending order) as well as the drag icon to move the column.

For example, I can move the "Start Date" column to the left side of "Due Date" and sort the tasks in ascending order by this field:

As you can see there are many more fields available included in ClickUp that can be shown or hidden in the list view.
Going to the "New Column" tab, which represents the custom fields, a long list of field types that can be added is presented, if you move the cursor over each of them, you will see a brief description of how the field can be used, for example:

Some of the most used are:
Dropdown
- Allows you to create a field that offers different default values from which you can choose one. For example, we could create a field called: "Contact Source" and whose values could be options such as:
* Facebook
* Twitter
* Youtube
* Instagram
* TikTok

- It would be displayed in the list as follows:

Date
- It allows me to enter any additional date that I may require in my task using the calendar interface that ClickUp uses by default, which allows the entry of dates in a very simple way. For example, we could create a field: "Date of Sale" that allows me to capture a date in the following way:

Number
- Field that accepts only numerical values, for example: "Quantity". If you try to capture an alphanumeric value, ClickUp will display an error message:

- In this case I tryed adding a letter after the number 4.
Money
- Similar to the previous one, it allows you to capture only numbers but it does so using a money format, you can even specify the currency to use.

- The column would look like this:

Formula
- It allows you to create calculated fields, using the information from other fields as a base. For example, we could create the "Total Amount" field based on the two previous custom fields:

- Using the "Advanced Editor" option you can create more complex formulas, the normal editor (shown above) only allows simple formulas with the four basic operations. The column will look like this:

Checkbox
- This field type allows you to "mark" the field with a flag or leave it unmarked, for example:

- It allows capturing an email address and automatically validates the field, displaying an error message if necessary:


- With a validated field, as shown in the image above, clicking on the email address automatically opens the email editor and copies the address into the "To:" section ready for you to write your email.
Phone
- It allows to capture a telephone number in a simple way with automatic validation and pre-established format (mask) that facilitates both the capture and the reading of the numbers. It even has a section to capture the country code if necessary as shown below:

Website
- This field allows capturing a link through which I can access a website, a file, a directory, etc.

The custom fields created in a space are stored in a central library in ClickUp, in such a way that I can reuse them in other projects or tasks without having to re-specify them, which allows me to maintain the integrity of the information, standardization and avoid duplication of information or similar fields with different names.
To edit or delete any custom field, just select the pencil icon in the "Show/Hide" tab:

To display the interface that allows you to edit the name, mark it as a required field or delete it completely:

Custom fields offer the possibility of capturing practically any type of information within a task or project, which makes ClickUp a very powerful and complete tool.
Until next time and remember that the standardization of plans and processes does nothing more than improve the quality of the result and repeated iterations generate an upward spiral.